
Pumpkin Shaped Sourdough Loaves
Pumpkin shaped sourdough loaves are my favoriteee to make this time of year. They’re such a fun way to do something different with your standard dough, and they make the best gifts for friends and neighbors! Elevate your sourdough bread, and try a pumpkin shaped loaf (it’s easier than you would think!) this fall. Here’s how to do it!

What to Know About Making Pumpkin Loaves
A few things to know before you make a pumpkin shaped sourdough loaf. One, use butcher twine (the kind I use is linked below), or some kind of string that won’t leave fuzzies behind once your bread is baked. Make sure to soak the twine in water or a clean oil (like olive or coconut) to reduce sticking and prevent the string from burning in the oven. I soak mine for at least 30 minutes to an hour, or even longer if I have time. Don’t tie your strings too tight - you want to leave room for expansion in the oven. And don’t overthink it! Pumpkins are supposed to be imperfect.
Supplies
Here’s what you’ll need to have on hand to make this:
cold proofed sourdough (boule shape)
parchment paper
butcher twine/string (this is the butcher twine I use, and this roll has lasted me years)
cinnamon stick or sprig of fresh herbs (for decorative stem)
How to Make Pumpkin Shaped Sourdough
Prep
Preheat your oven to 475F (or whatever you normally bake your artisan sourdough loaves at) with a dutch oven inside. Cut 4 equal sized pieces of butcher twine (I eyeball the length each time, but you want each piece to be long enough to go all the way around your loaf with some extra). Put the pieces of twine into a bowl and cover with water or oil to soak.
Shaping into a Pumpkin and Baking
Once the oven is hot, remove your cold proofed sourdough from the fridge. Ideally, use a boule shape to keep the round pumpkin shape.
With your dough still in the banneton, take your twine out of the water (or oil). One by one, lay each string on top of your dough, centering each piece so it’s equal length on either side. Lay them out in a star pattern - watch how I do it in the video tutorial above. Remember, pumpkins aren’t perfectly shaped, so don’t overthink it!
With your strings placed, put a piece of parchment paper over the dough (with strings still in place), and carefully flip the dough out of the banneton, so the strings are now on the bottom of the loaf.
Find each string’s ends, and tie together in the center of your dough. Again, don’t tie them too tight to leave room for expansion as the loaf bakes. Repeat for all strings. Cut any excess string left over after tying off to avoid burning in the oven.
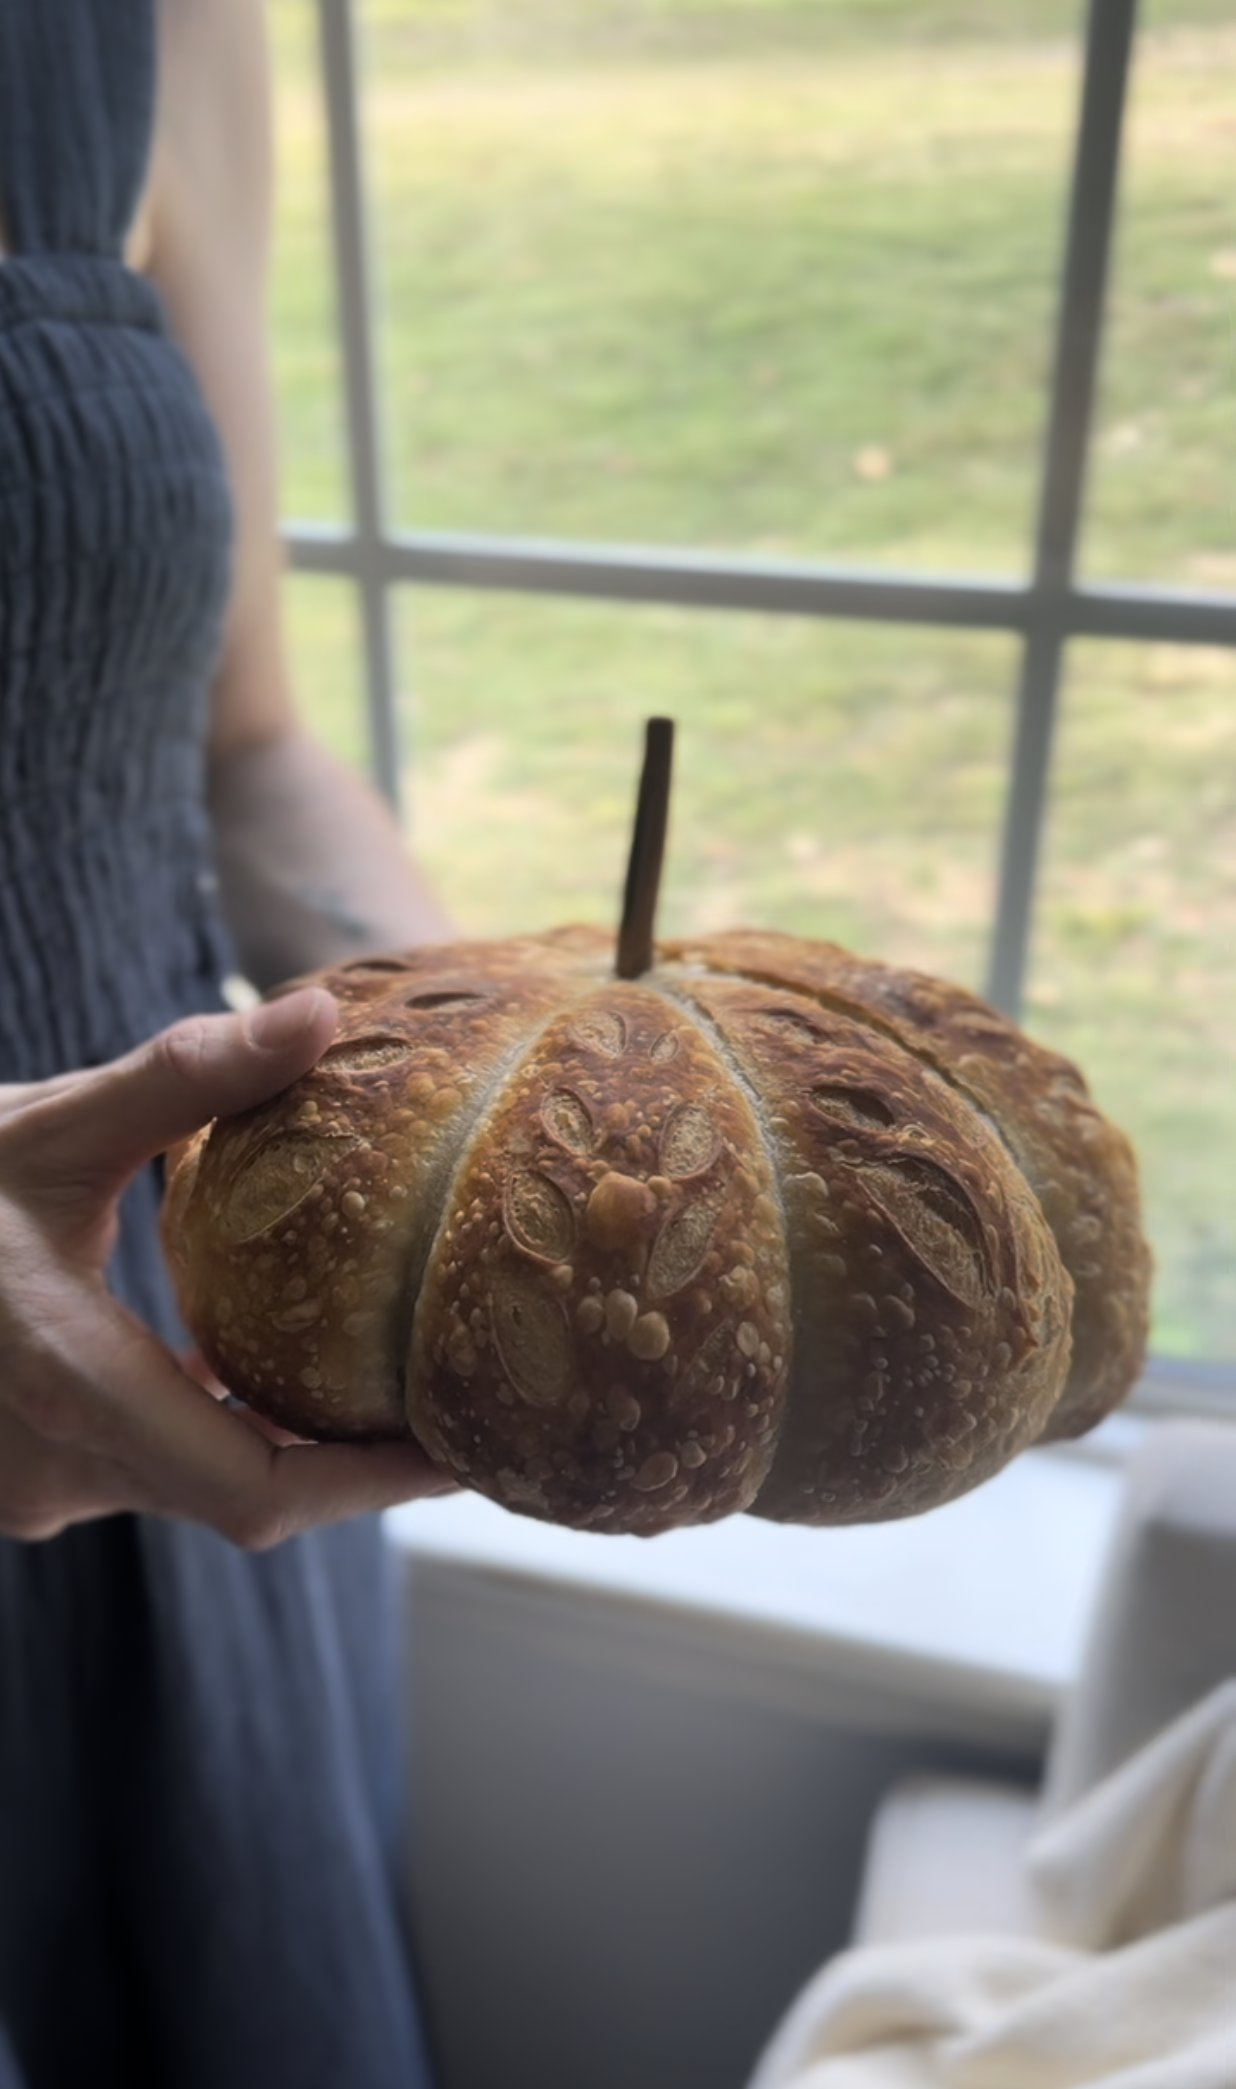
Score your loaf. Because these loaves don’t usually have a main expansion score, I typically do some decorative scoring on pumpkin loaves (with a few scores slightly deeper than normal to account for that expansion).
Quickly pull your dutch oven out of the oven, place your shaped and scored dough into it, and cover with a lid. Put it back in the oven and bake for 20 minutes.
After 20 minutes, remove the lid from your dutch oven and return to the oven. Bake for another 20 minutes or so (keep an eye on it as every oven runs differently). When it’s reached a nice dark golden brown color, remove from the oven. Let cool for 1-2 hours.
When your loaf is cool, cut the strings and gently pull off.
Stick a cinnamon stick or sprig of fresh herbs in the center as a cute stem! Enjoy!


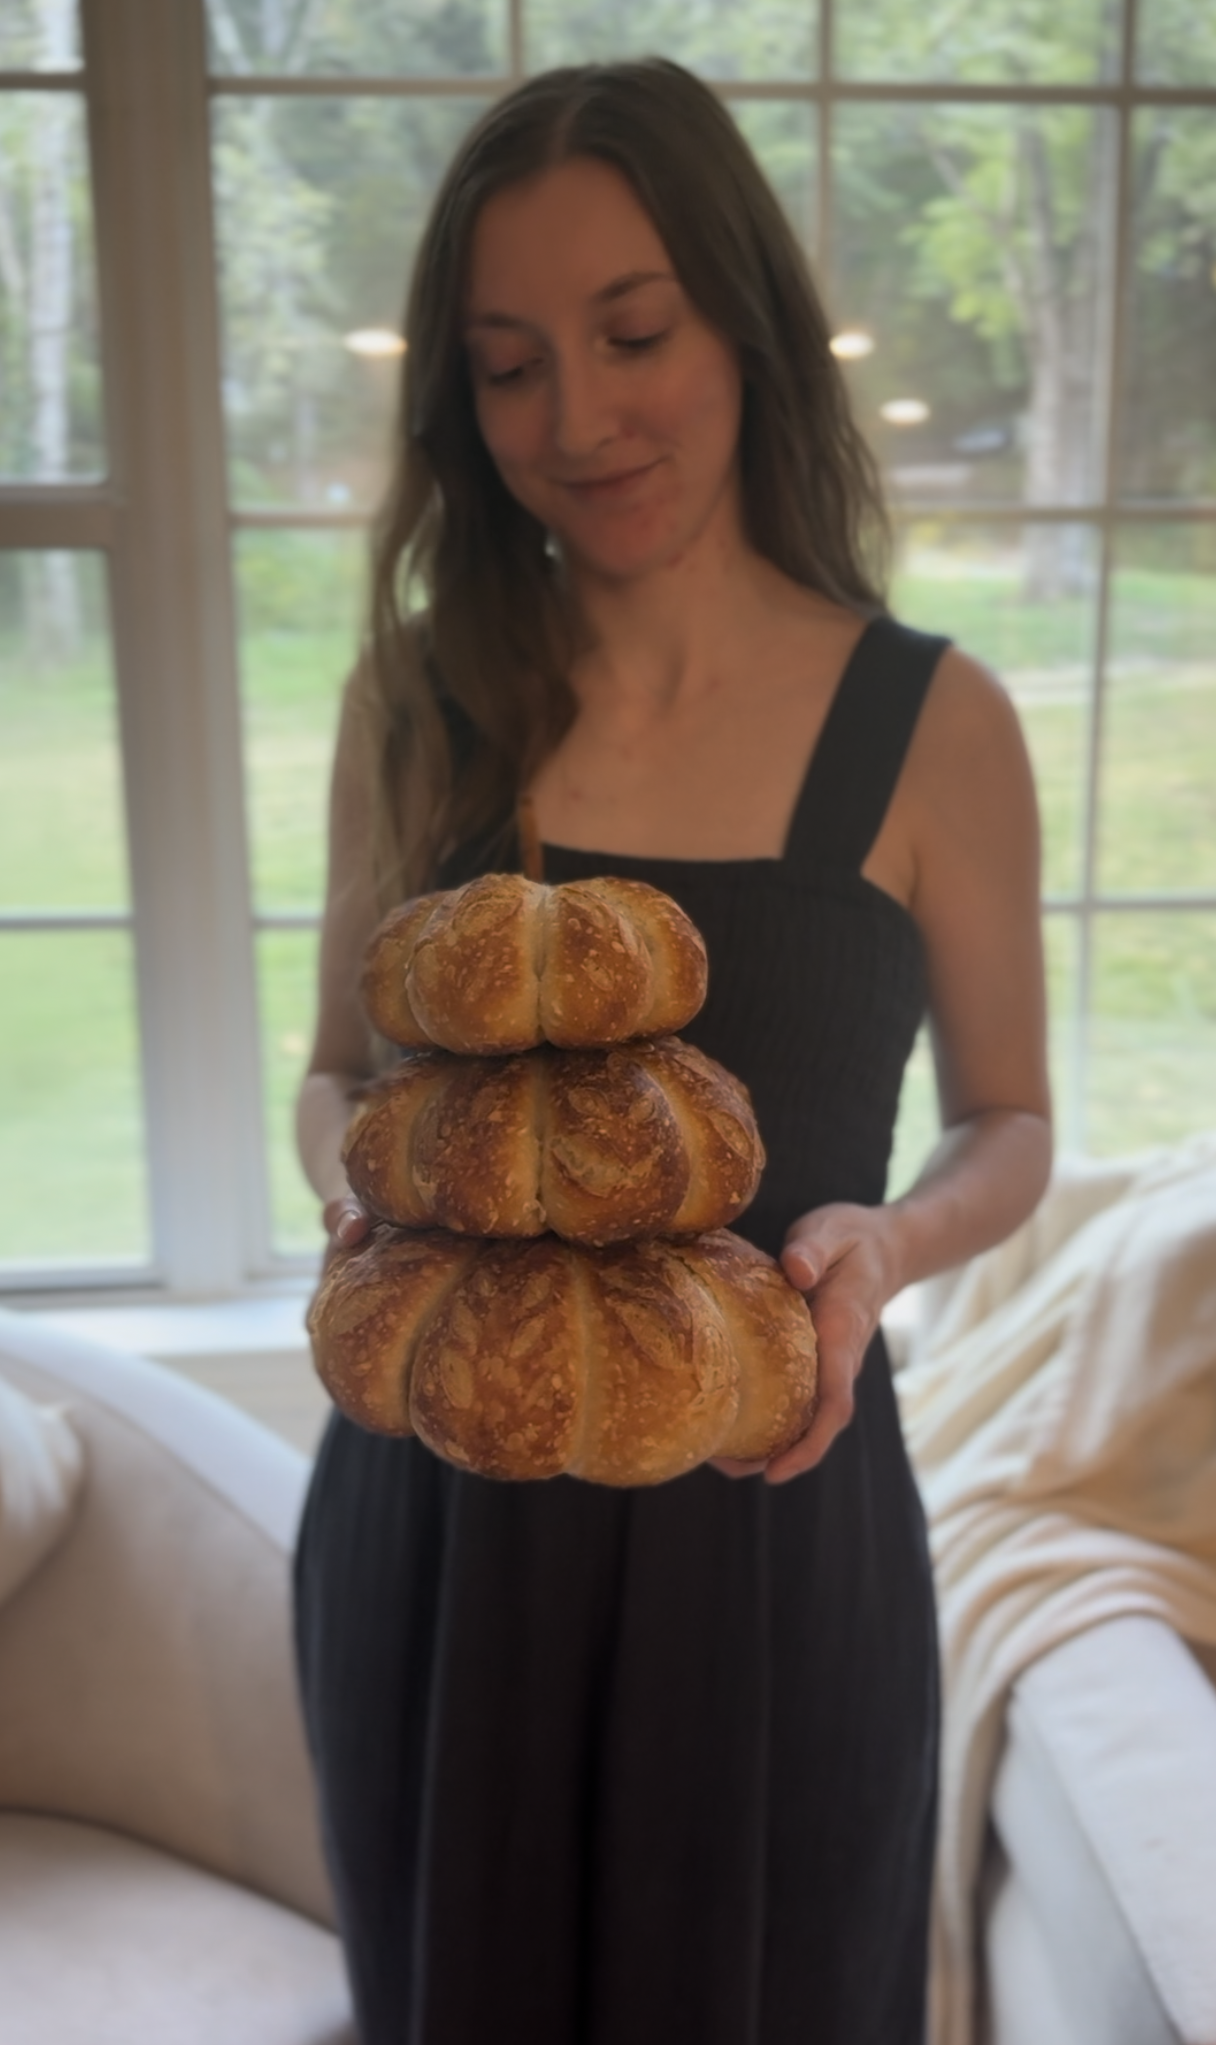
Make Everything Pumpkin Shaped
This isn’t just for artisan sourdough loaves - you can make lots of things pumpkin shaped! Make sourdough bagels, brioche rolls, and more pumpkin shaped using this method.
Storage Instructions
Just like my other sourdough loaves, I recommend storing at room temp if you’re going to be eating the entire loaf in a few days. My preferred way is to cut your loaf from the middle and store it cut side down on a cake stand with a lid, or in a bread bag or box.
Otherwise, these loaves freeze great! Wrap a cooled loaf in a plastic bag and freeze for up to 3 months. When ready to eat, pull it out of the freezer, let it thaw, and refresh by running the loaf under a little water and putting in the oven at 350F for 10-15 minutes. It’ll taste like new.
If you give these a try, tag me on Instagram @bysourdoughmama — I love seeing what you make!
Want to learn more about sourdough baking?
Check out my full Sourdough Basics guide, or sign up for updates on upcoming sourdough workshops right here.