
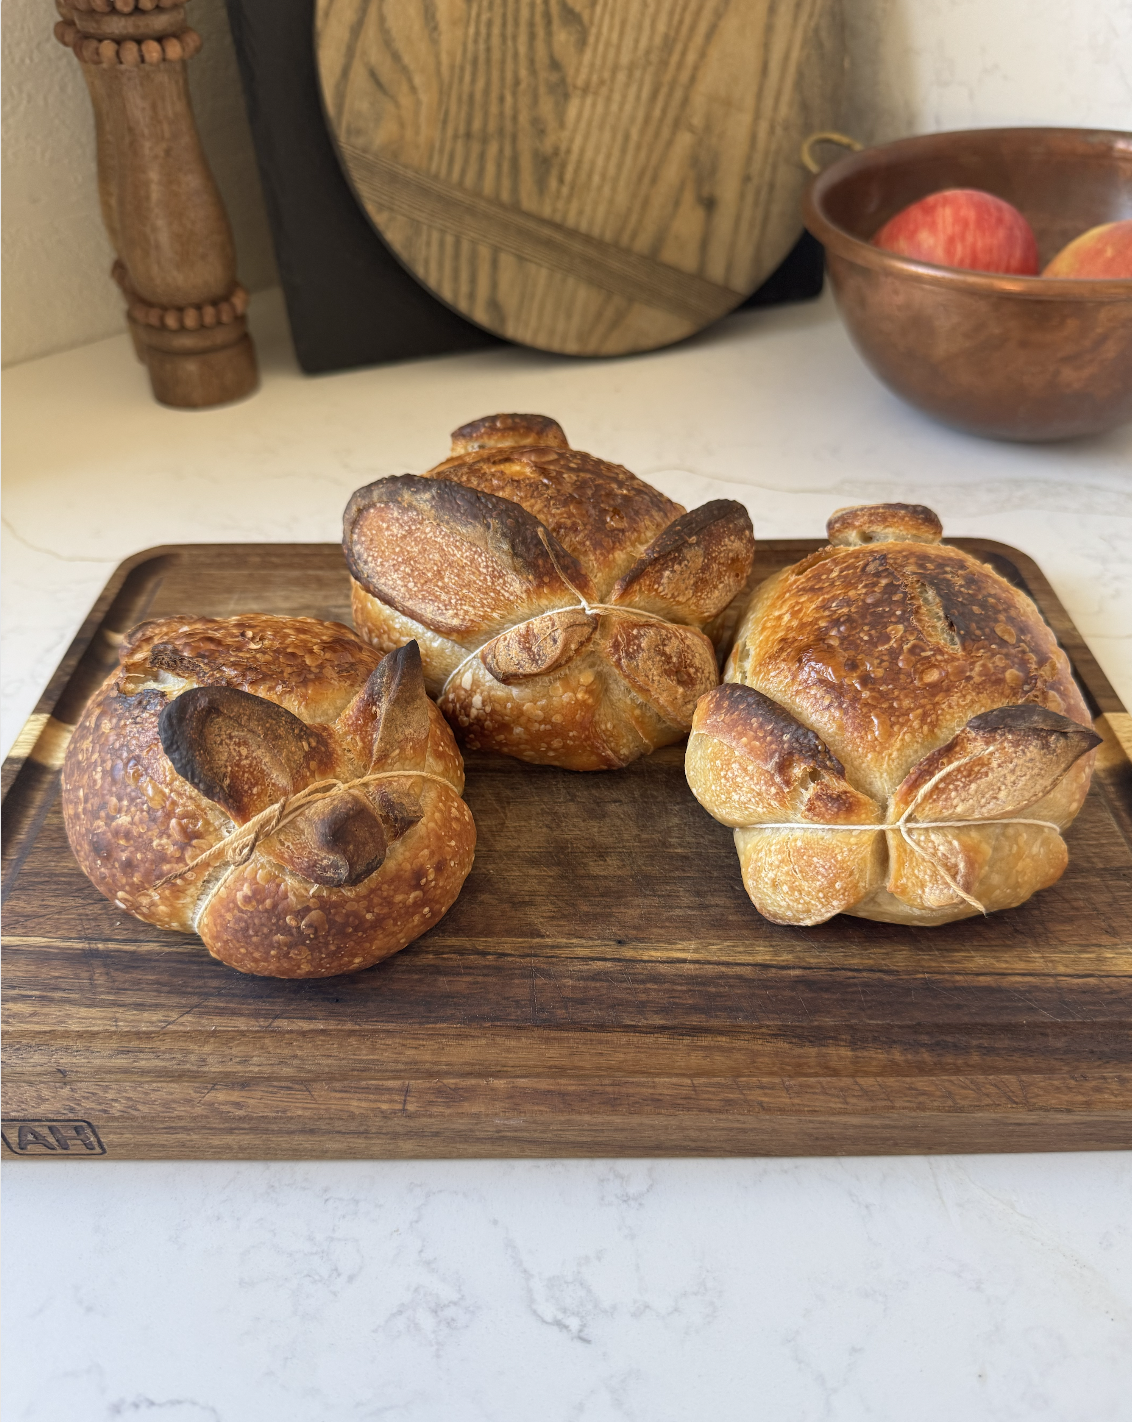
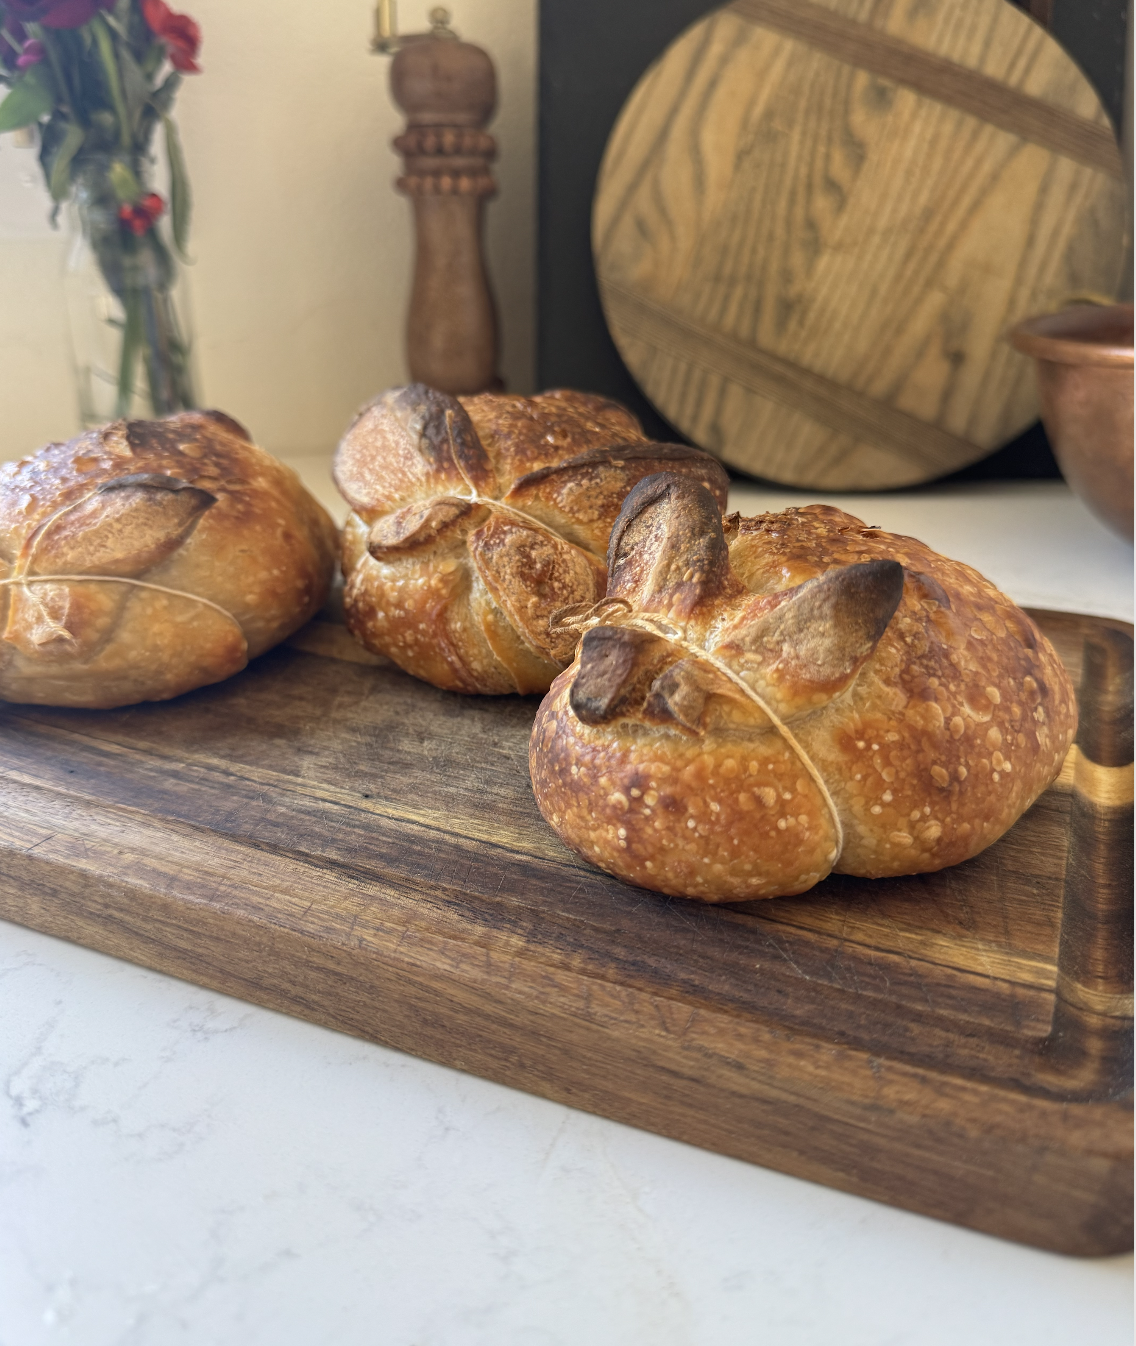
Sourdough Easter Bunnies
Sourdough Easter bunnies are the cutest centerpiece for your holiday table! Your guests (and kids) will love them, and they come together easily with one batch of dough that can easily be doubled or tripled for your Easter table. (They would also make such a cute addition as an Easter basket treat!) They look impressive, but are easy enough even your kids can help. I’ll walk you through how to shape them below.
Ingredients
You can use whatever your normal artisan sourdough bread recipe is, but this is mine! I made my normal sourdough recipe (ending up with about 925g of dough), and then divided into three equal weights (about 308g each) to make three mini bunnies. If you want to make one big one, that works too (photo tutorial below shows one large bunny, but same method).
50g active sourdough starter, at peak
360g filtered water
500g flour (I use Sunrise Flour Mill organic heritage flour)
10g Himalayan/pure sea salt
Helpful Tools
Instructions
Making Your Dough
Mix your dough and let rest for 30 minutes to an hour (fermentolyse). From there, begin stretch and folds (one set every 30 minutes, 4 sets of stretch and folds total over the course of about 2 hours).
Move to bulk fermentation. Don’t go off the clock here, only your dough! When the bulk fermentation is done, your dough should have risen about 70%, you’ll see lots of air bubbles under and throughout your dough, and the dough will begin “doming” or rounding out on top. This time will vary depending largely on the temperature of your dough and environment.
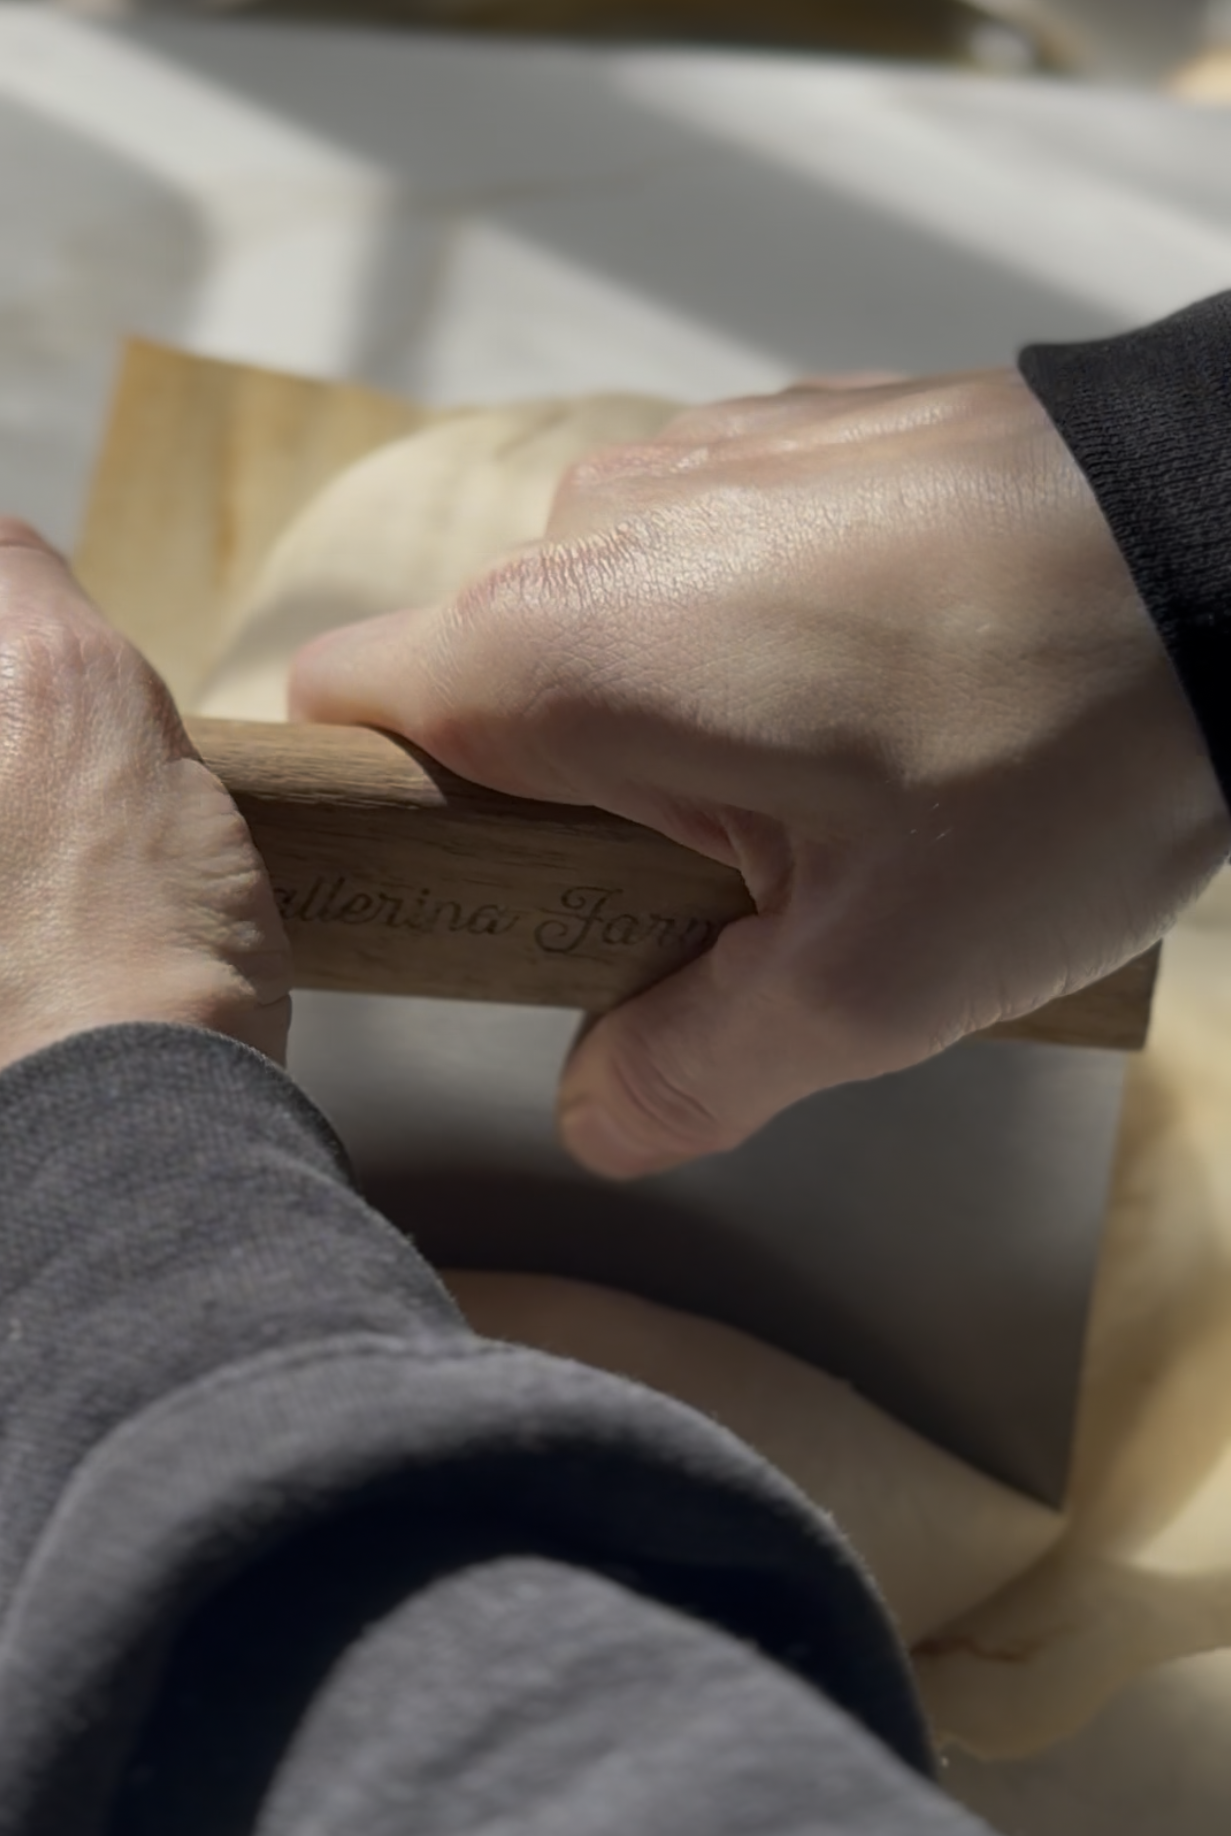
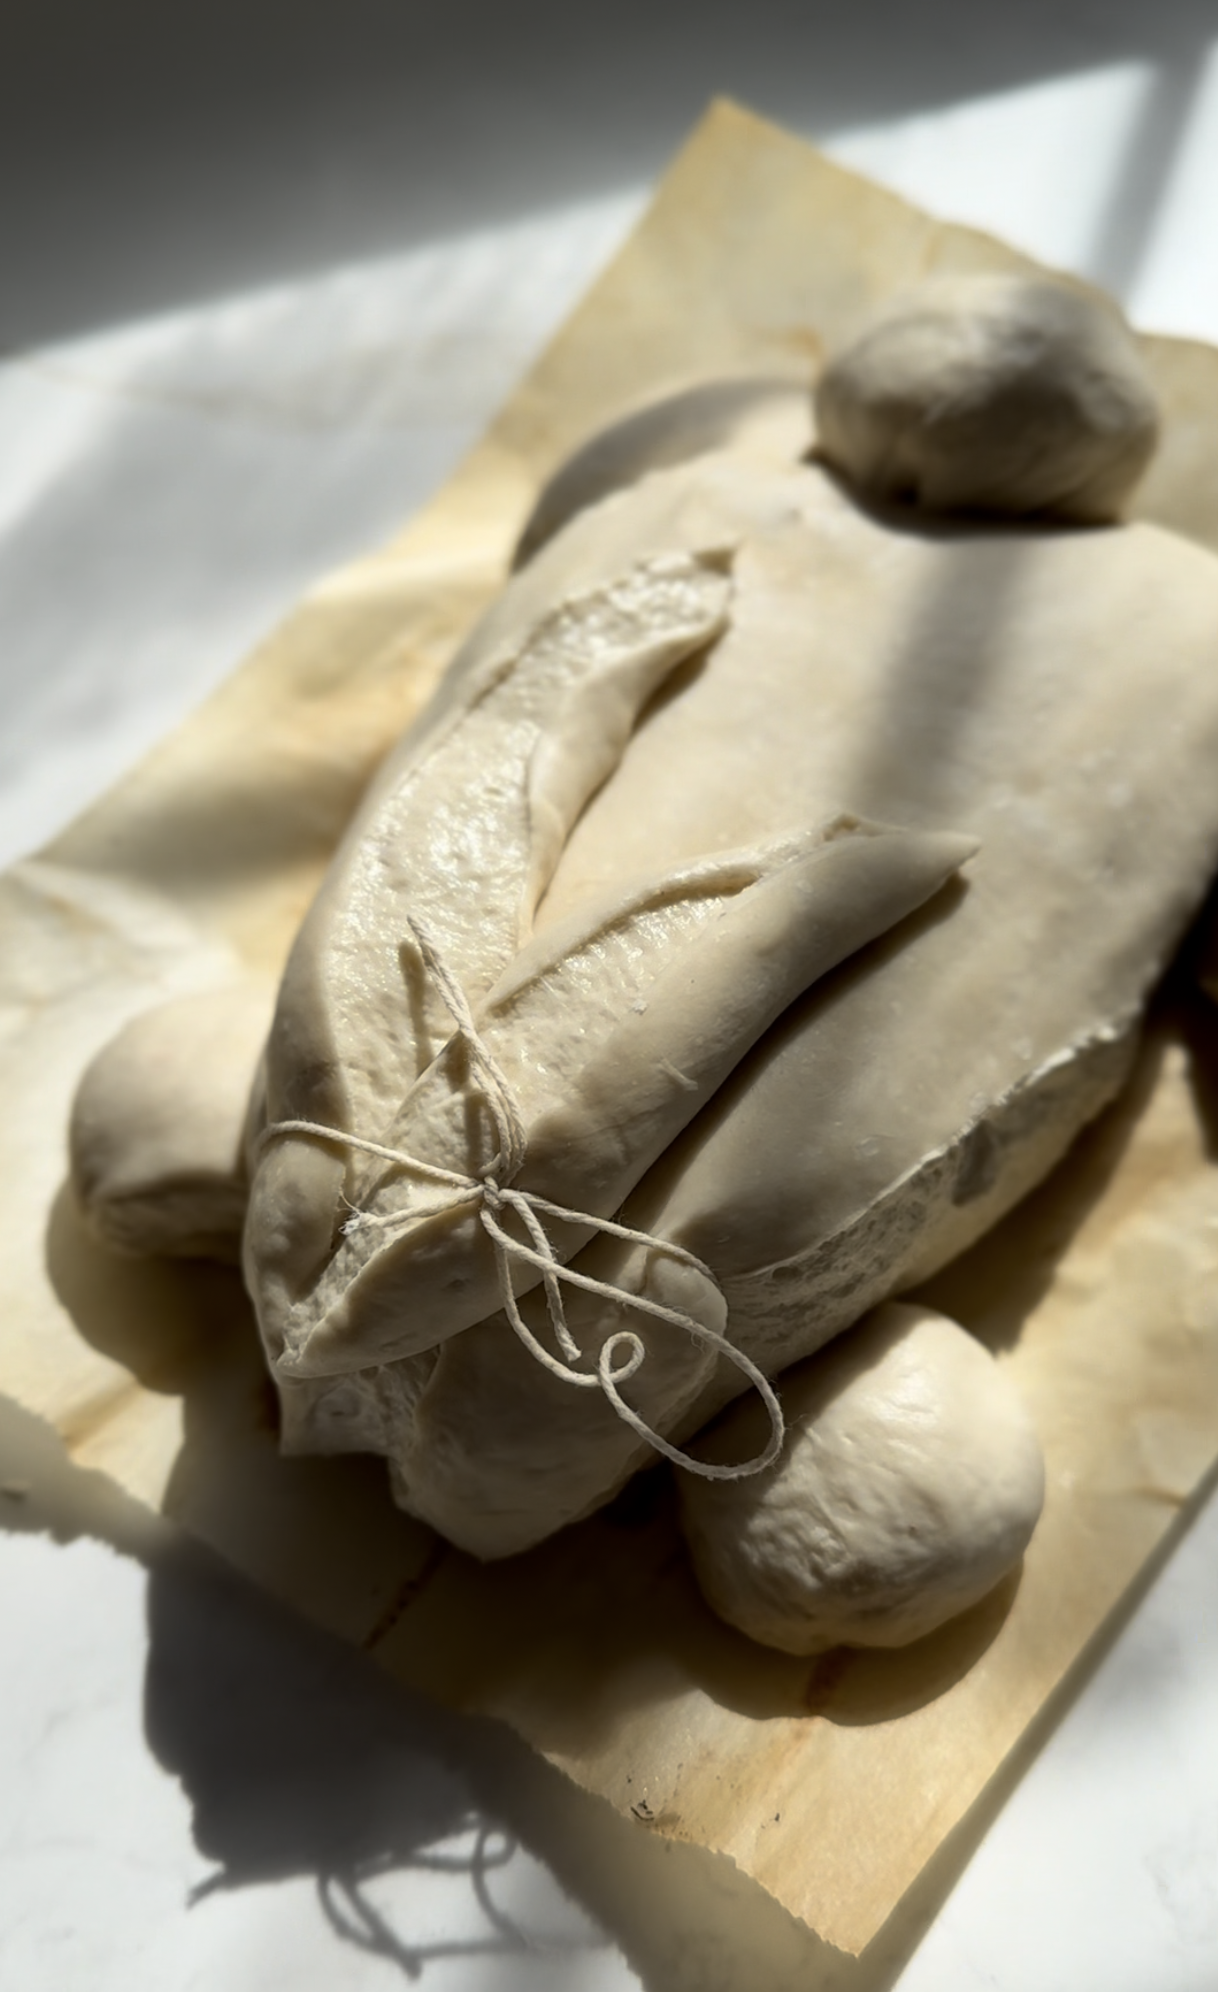
Take the dough from the bowl. If you want to divide your dough into smaller sizes to make mini bunnies, do that now. Then shape into a batard (oval shape), put in your banneton(s), and put in the fridge to cold proof. (The length of your cold proof is up to you. My preferred time is about 24-36 hours.)
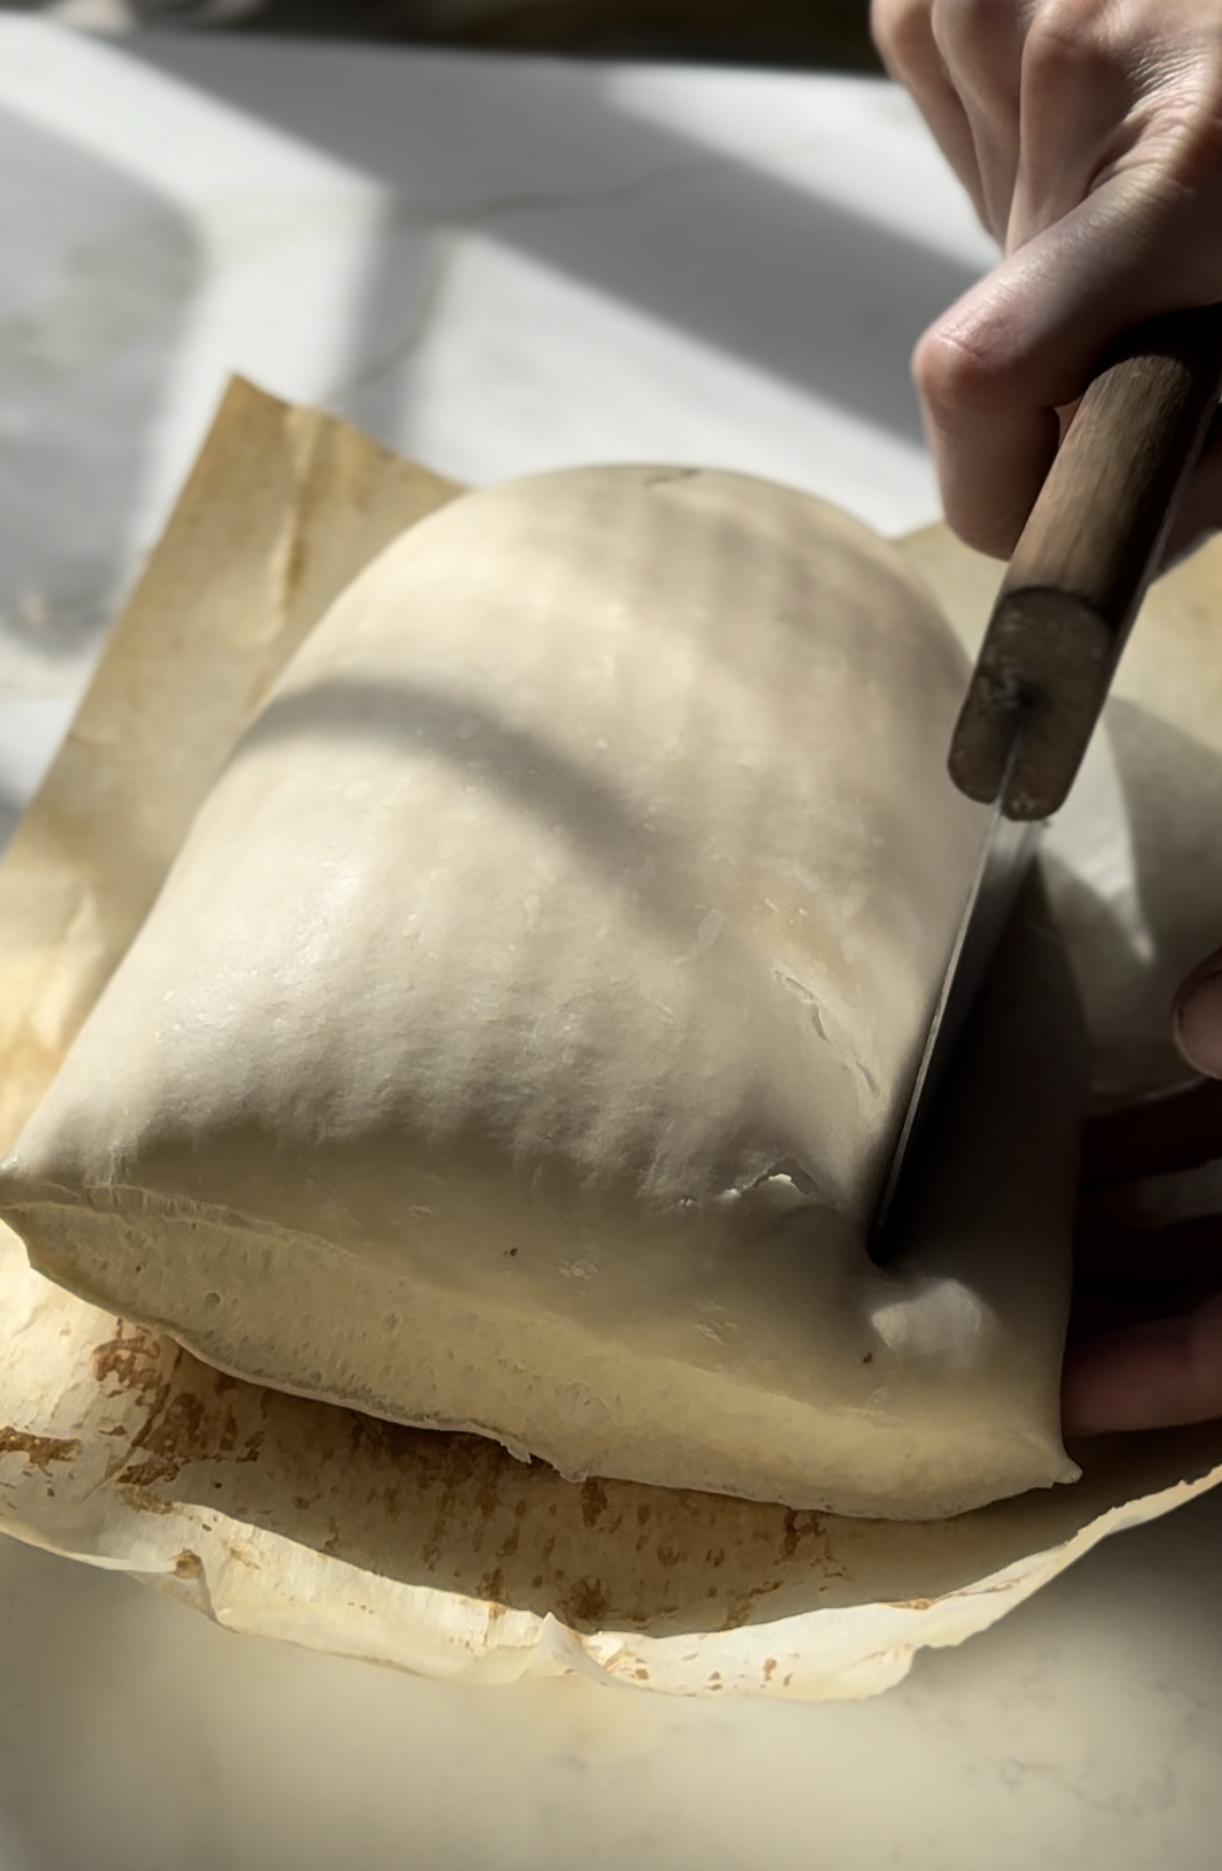
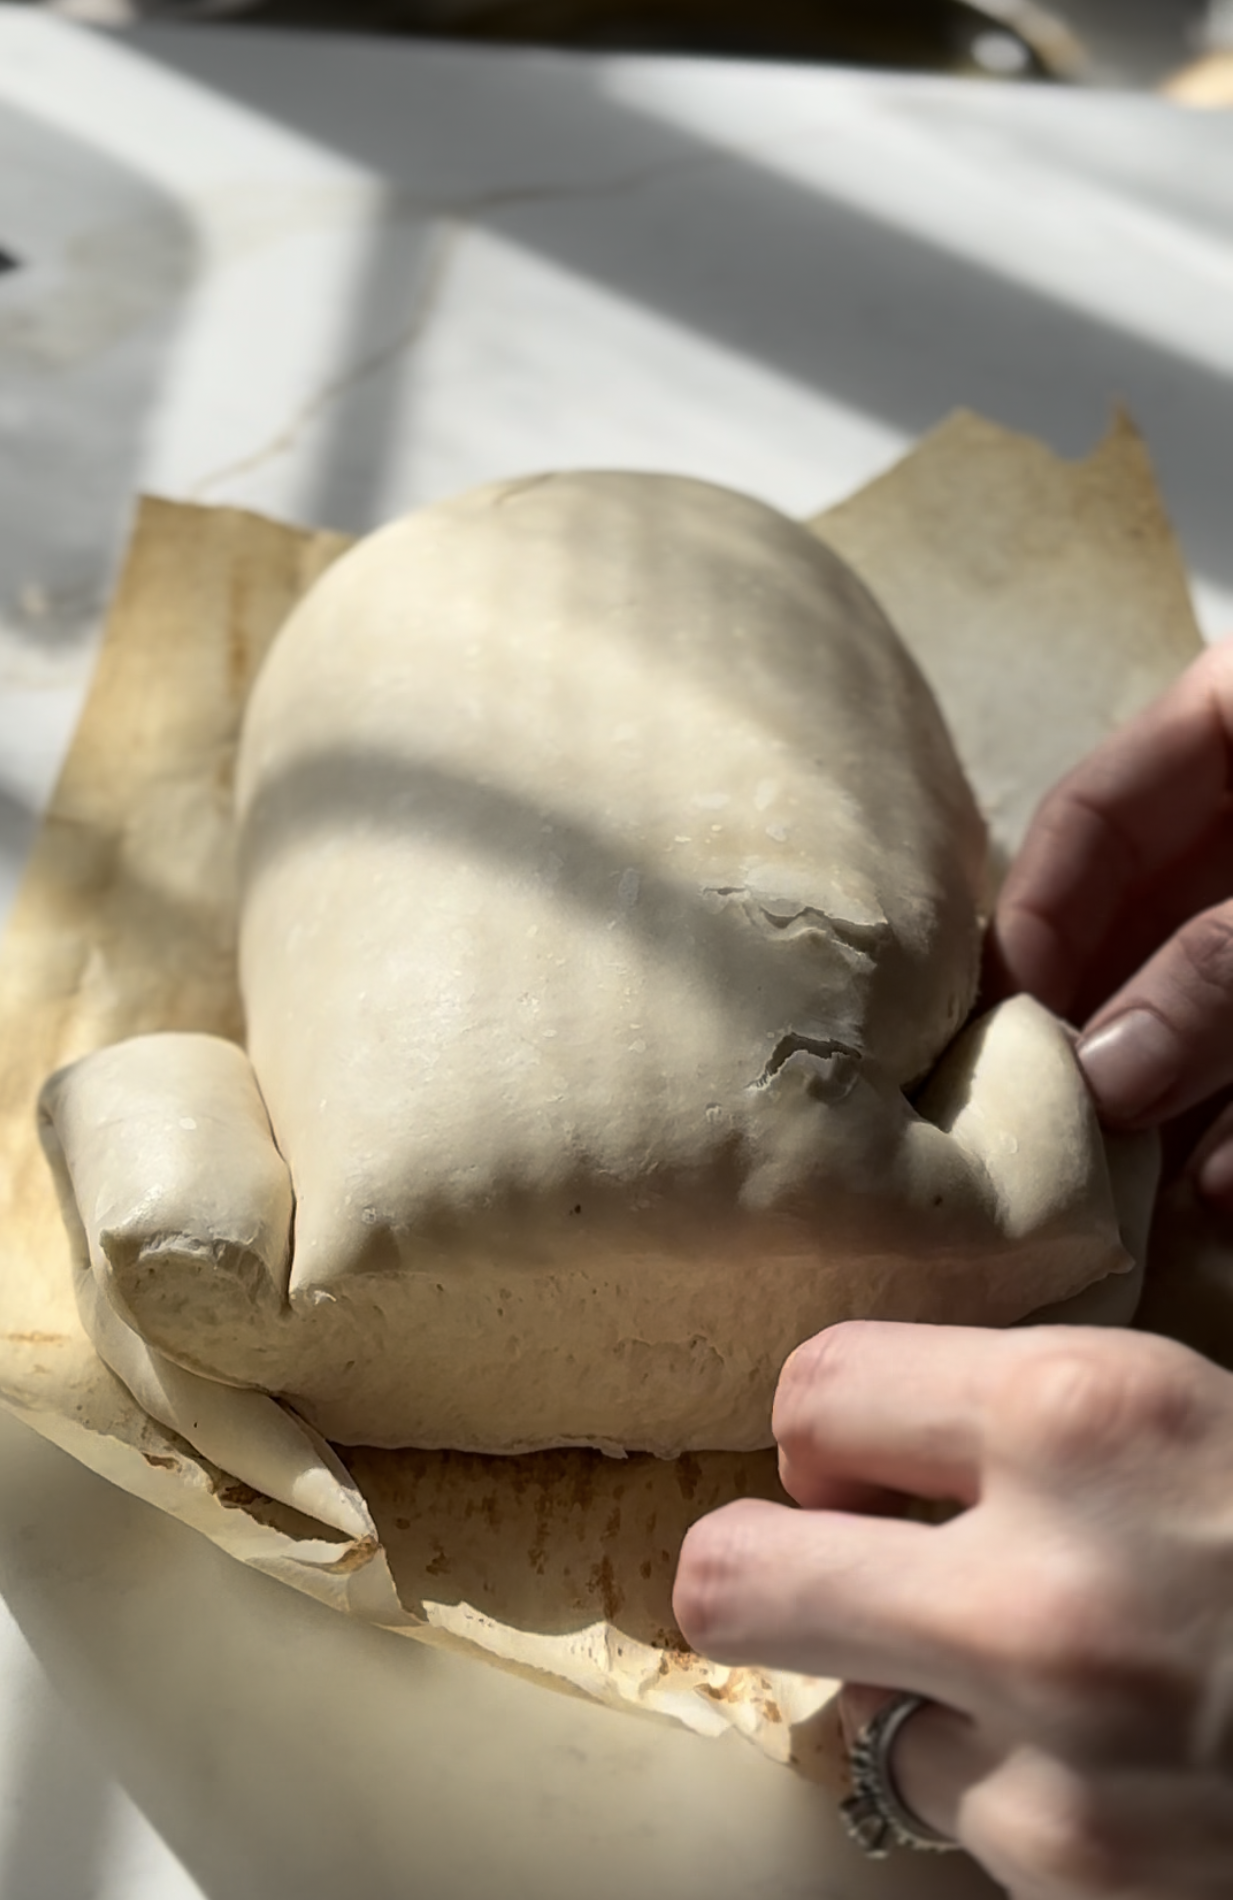
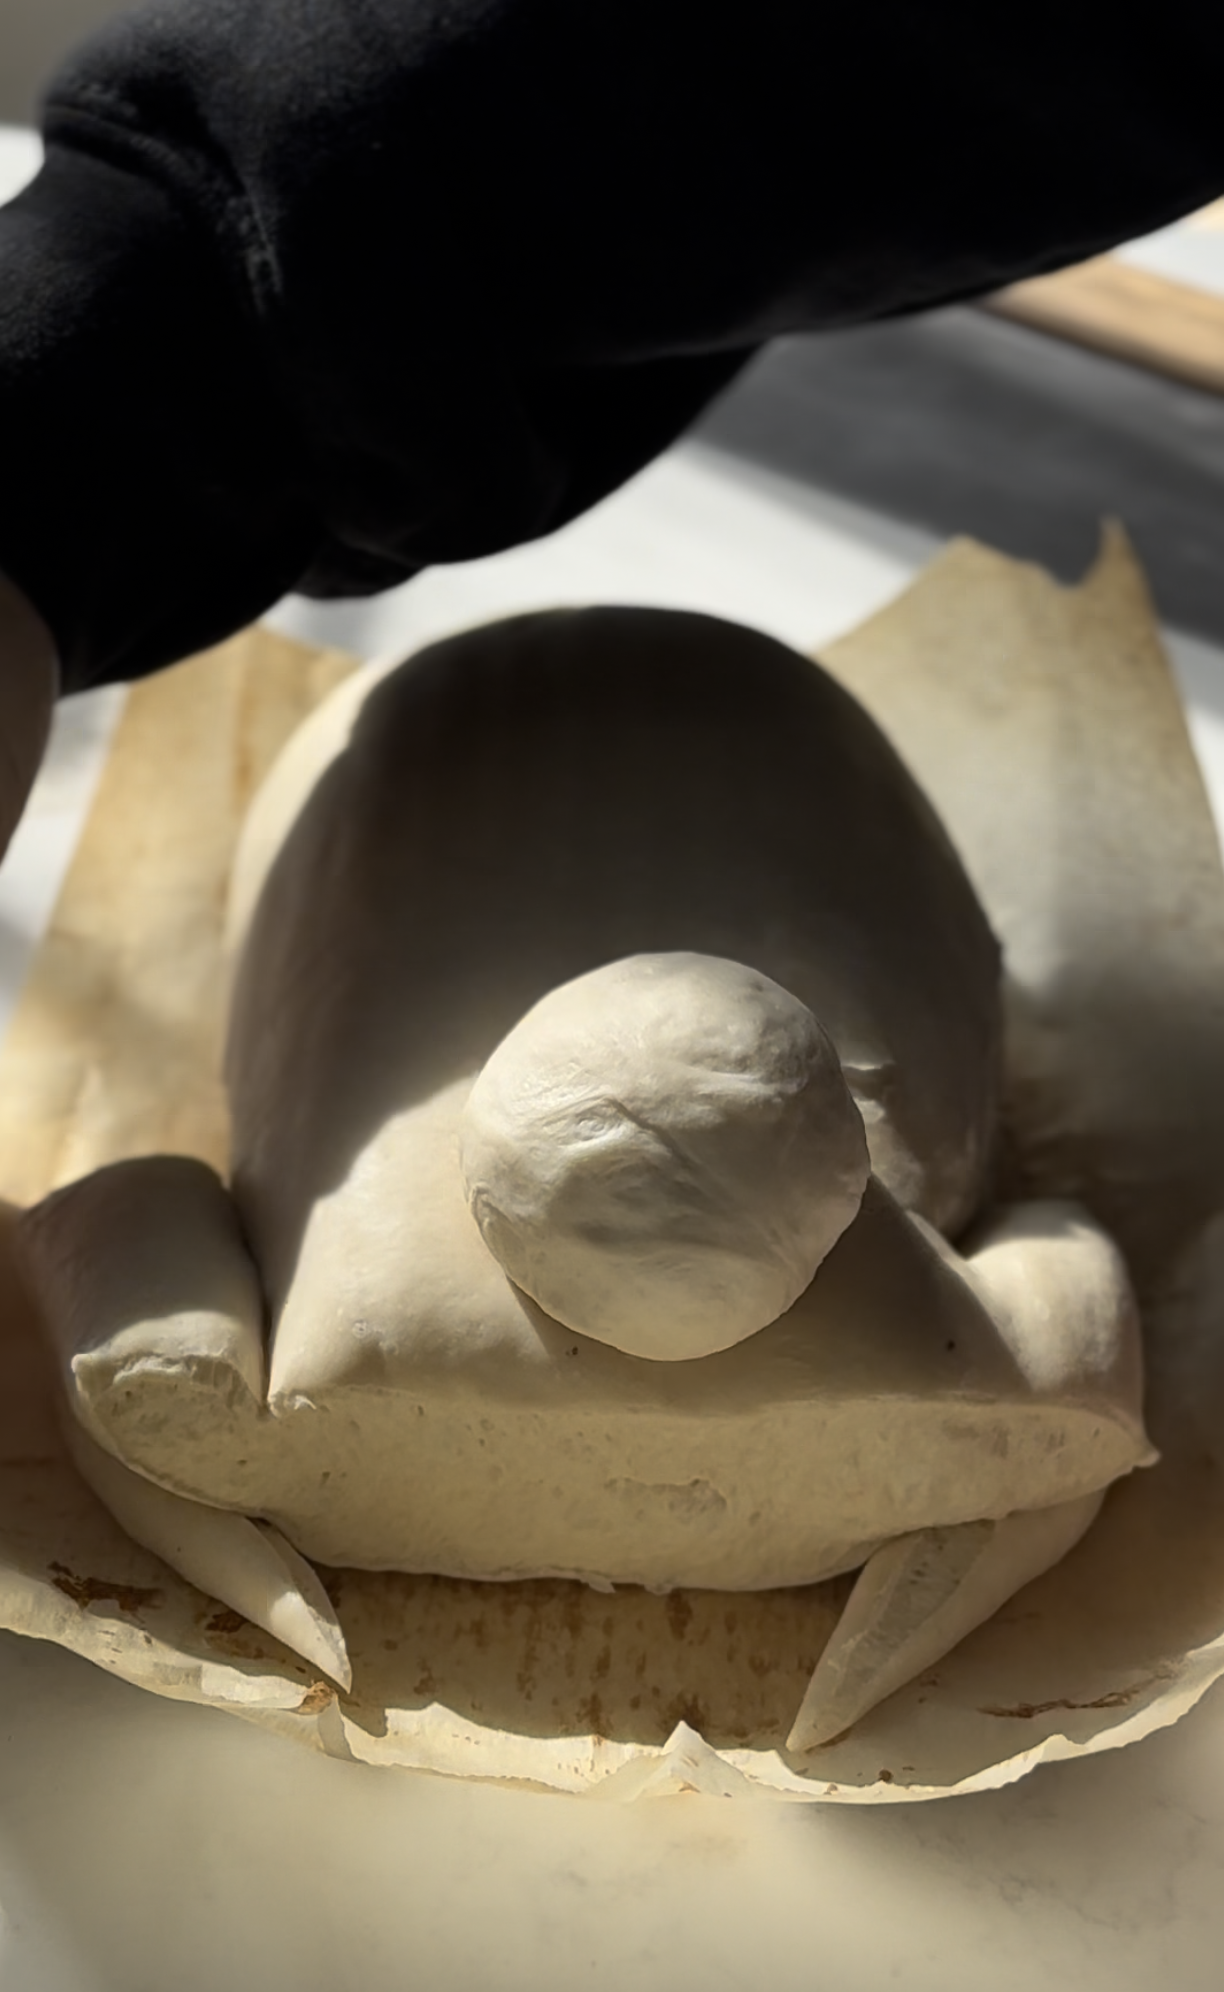
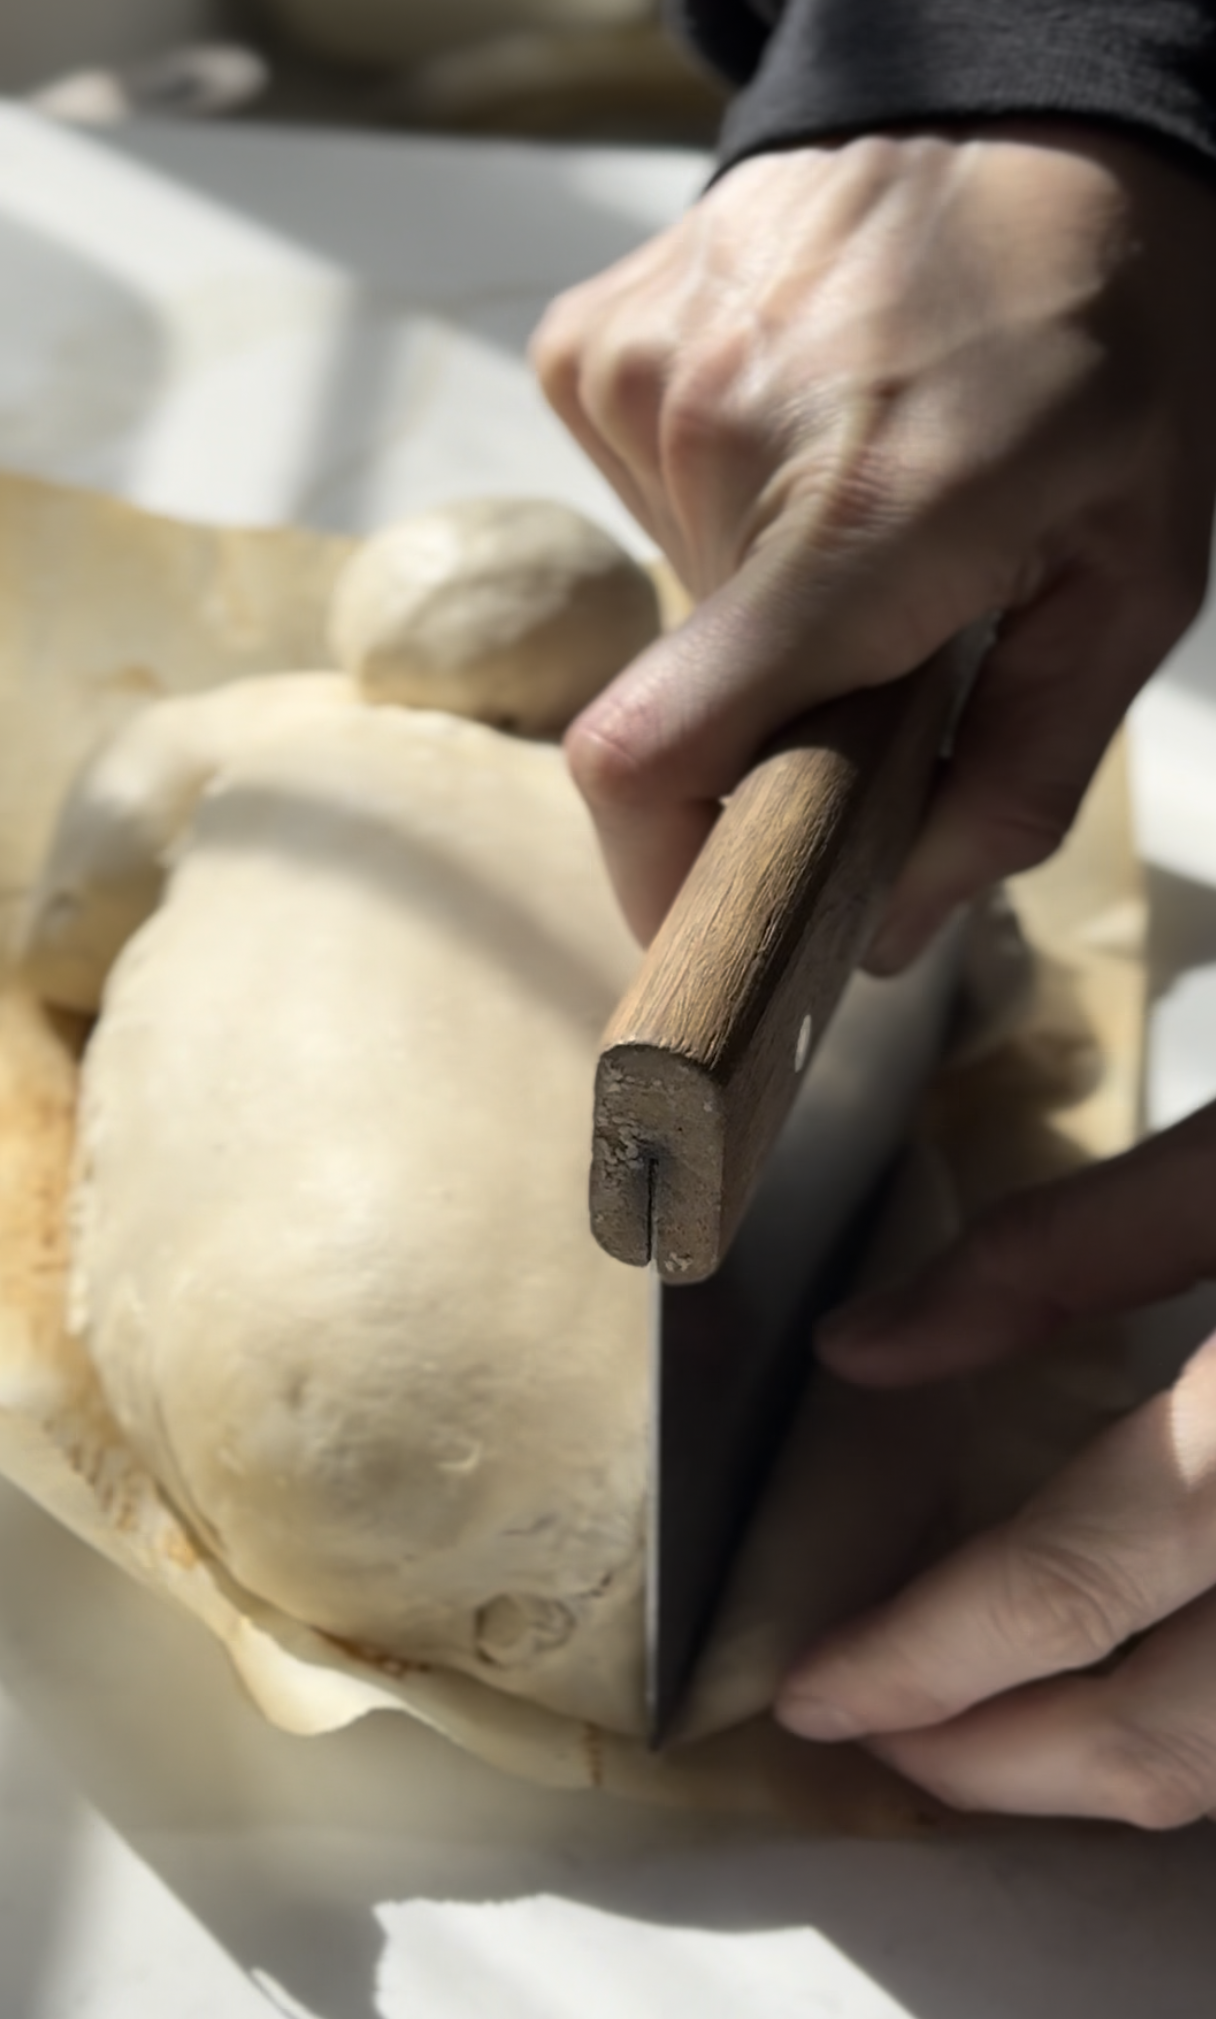
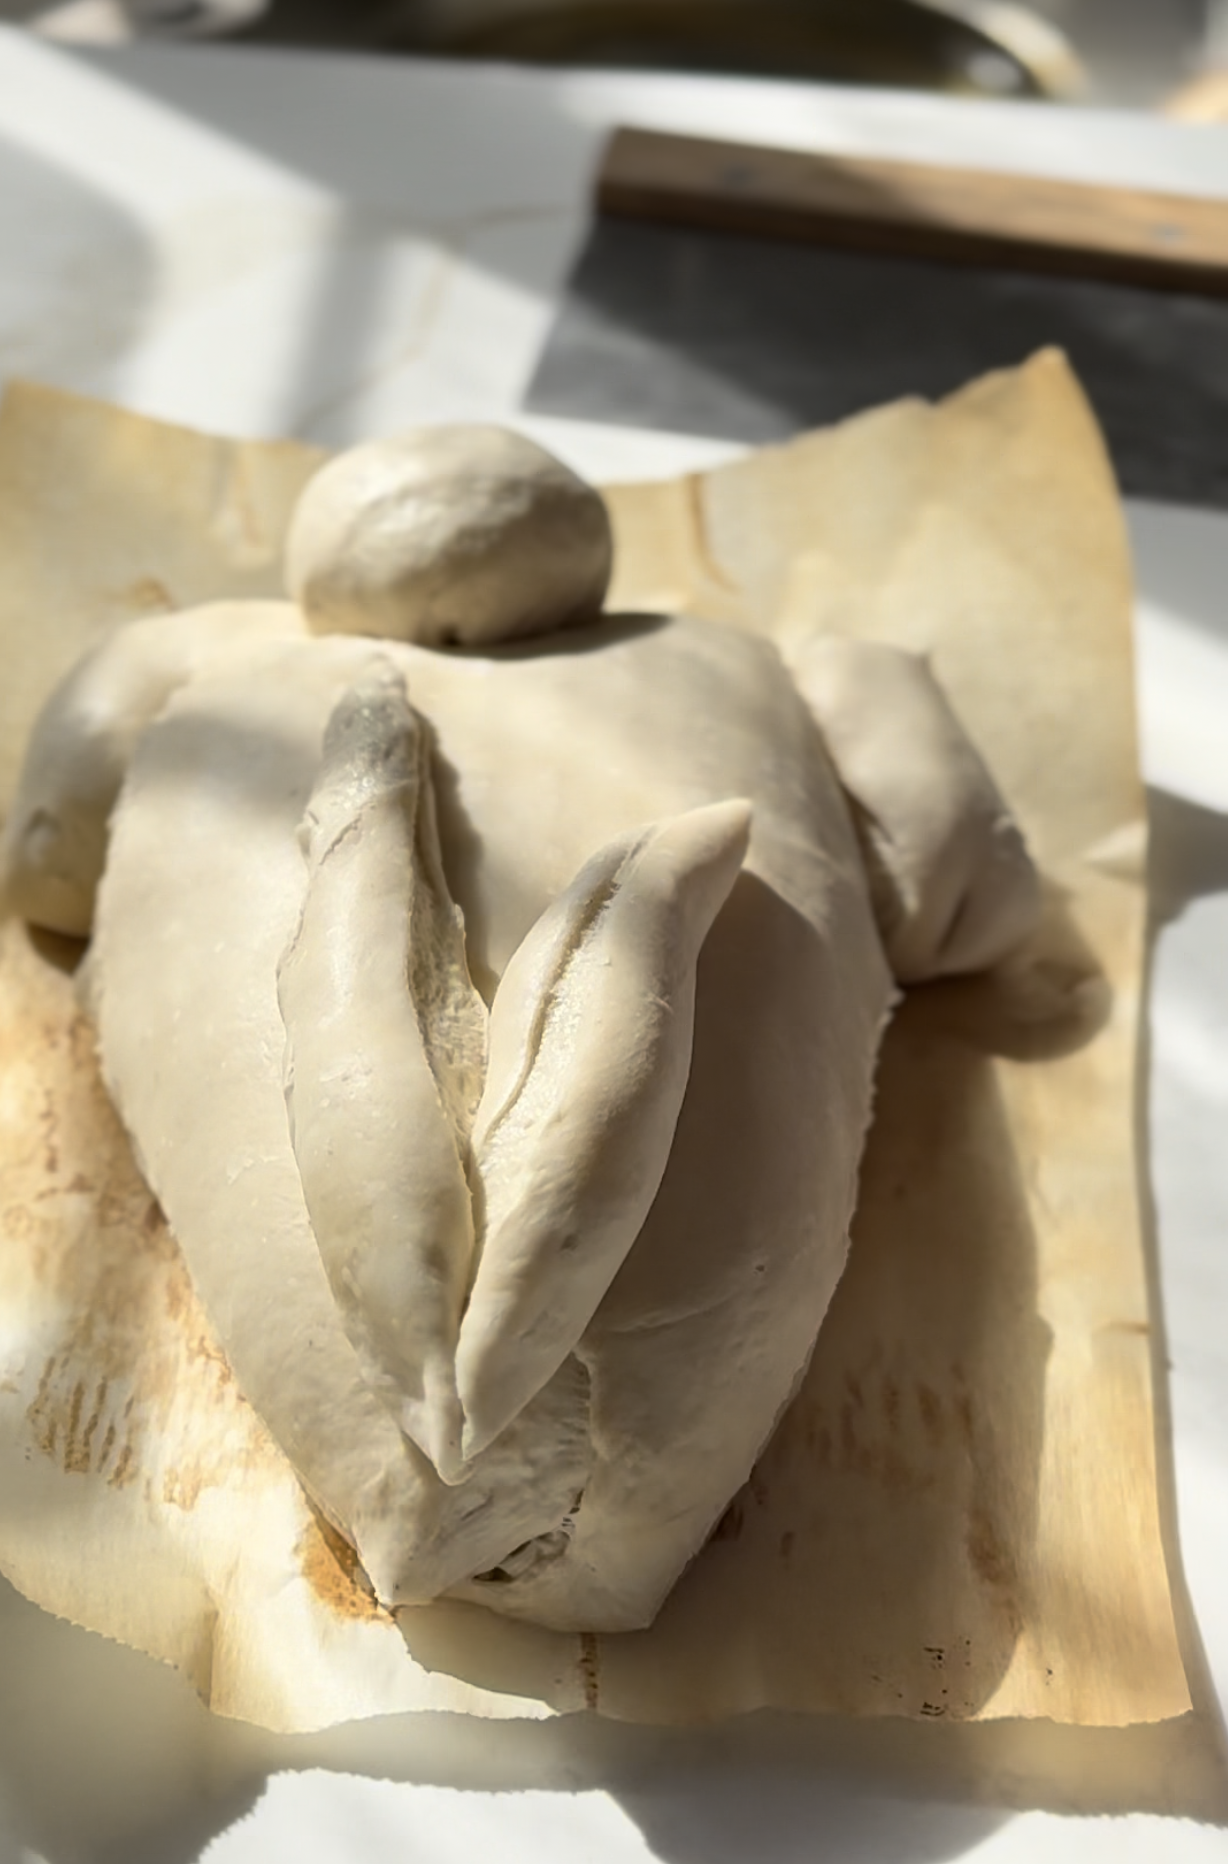
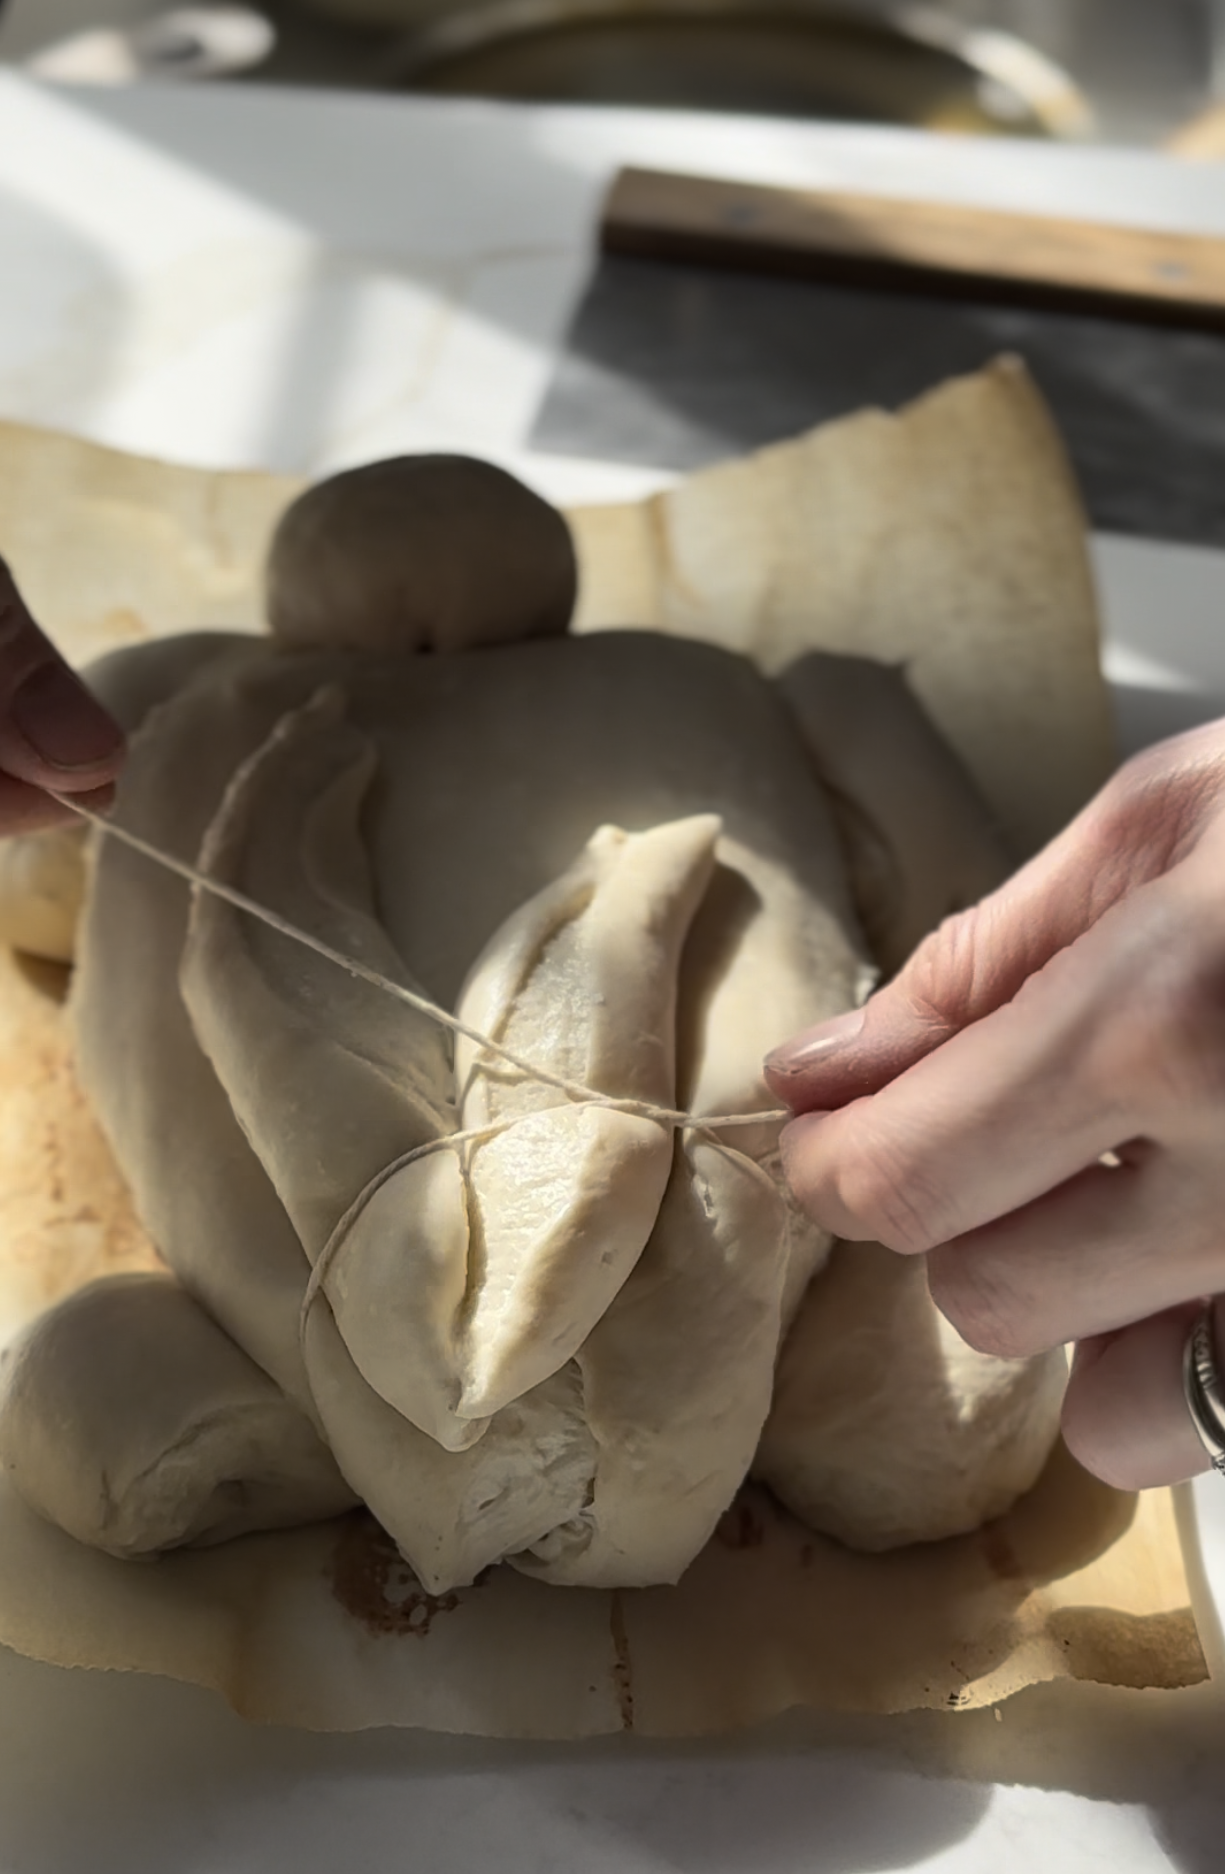
Shaping into Easter Bunnies:
At this stage, preheat your oven to 475F with your dutch oven inside.
Photos below show making one large sourdough Easter bunny, but you can follow the same steps for smaller ones. Note: for mini bunnies, I find it easier to skip the back legs and just cut a small portion off to shape into a round tail, but you can do either way!

Baking
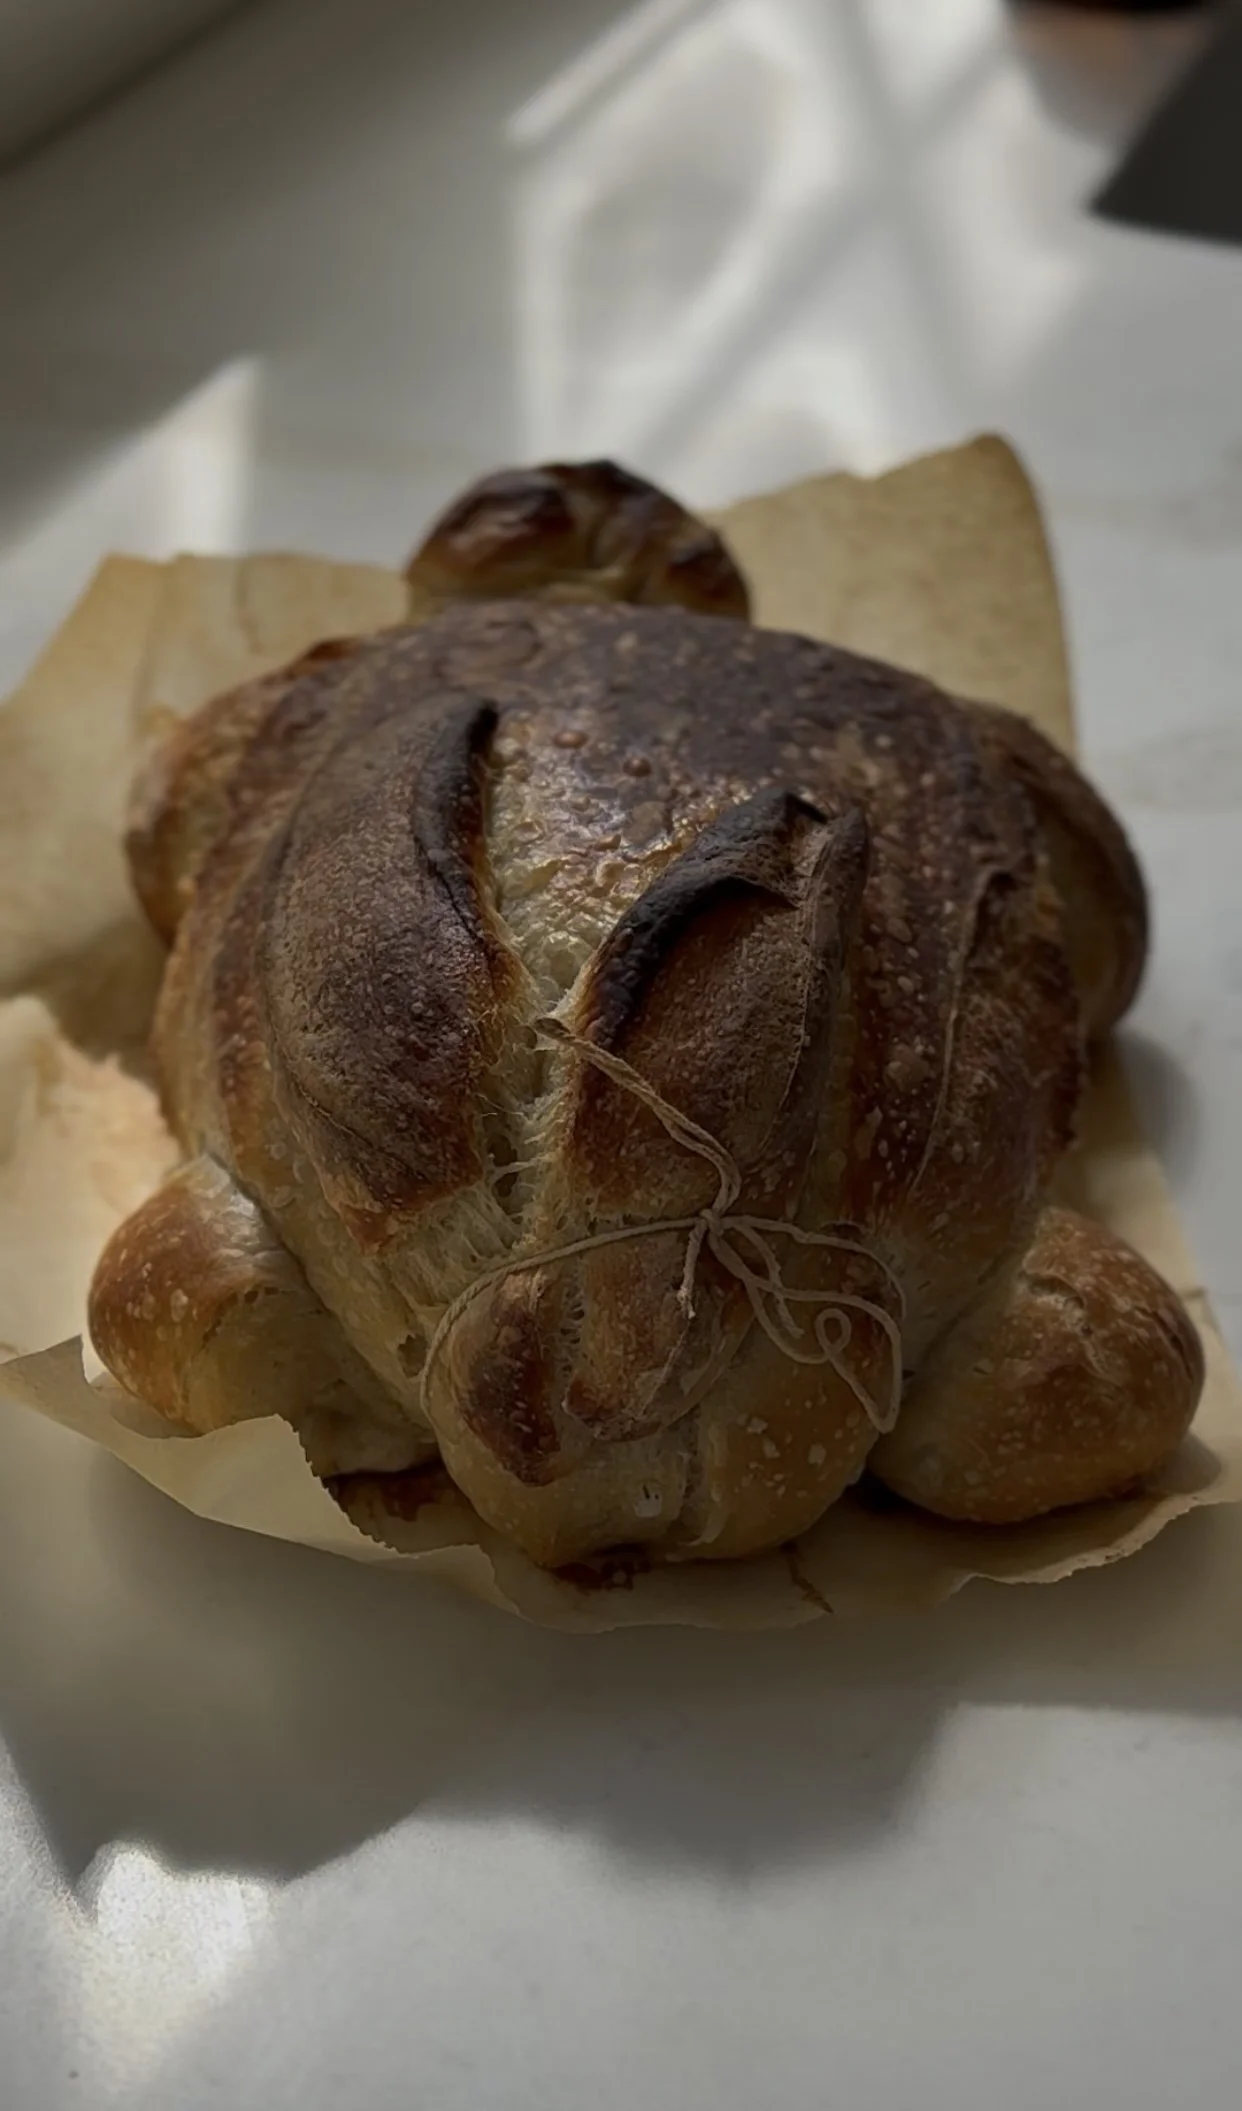
Once your bunny is shaped, place your dough into your hot dutch oven. Place the lid on, and put in into the oven for 20 minutes (large loaf) or 16-18 minutes (mini bunny loaf).
After the first half of the bake, remove the dutch oven lid and bake for another 18-20 minutes (large loaf) or 15-ish (mini loaves). When it’s a dark golden brown color, remove from the oven and let your bunny loaf cool for an hour or two. Cut the twine and gently pull off.
Once cool, it’s ready for all the Easter festivities!
Twists on Sourdough Easter Bunnies
There are so many fun twists you can do with these sourdough Easter bunnies - adding inclusions to make a flavored loaf, doing different sizes for a little Easter bunny family, and using them for different gifts and celebrations all spring.
Want some ideas for inclusions to make with this recipe? Here’s some of my favorites:
Chocolate Croissant Sourdough Loaves
Cranberry Walnut Orange Cardamom Sourdough
If you try this, please tag me on Instagram @bysourdoughmama and show me your Easter bunnies!
Want to learn more about sourdough baking? Check out my full Sourdough Basics guide, or sign up for updates on upcoming sourdough workshops right here.